
How To Start A Blog On Hostgator Step By Step Guide
How To Start A Blog On Hostgator: 15 Minute Step By Step Guide
Blogging is about so much more than turning out quality content on a daily basis. Although that is, and probably always will be, the most important part of the blogging process, the fact of the matter is that this once hobby has since turned into a lucrative business venture.We know that 8 out of 10 businesses fail, and as with most businesses, you are never going to succeed if you don't put your own time and money into it.
Trust me, however, when I tell you that it's well worth it in the end.
If you are interested in starting your own blog, you may be overwhelmed with choices from the very beginning.
From plugins to themes and beyond, bloggers are forced to make many difficult, important decisions very early on -- before they even publish a single blog post.
To ease the burden of starting your own blog, we have compiled a simple step by step instruction guide on how to start a blog on Hostgator to help you get on your feet.
Here's our guide to start a blog on Hostgator.
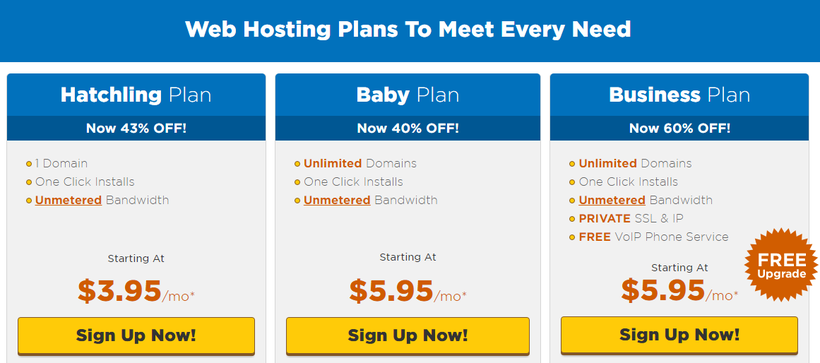
Step #1: Choose the hosting plan that is right for you.
 At
this time, Hostgator offers 3 different plans, each of which come with
their own set of perks. If you are just getting started, I suggest the
most basic plan for $3.95 per month. With this plan, you will receive 1
domain, 1 click installs, and unmetered bandwidth.
At
this time, Hostgator offers 3 different plans, each of which come with
their own set of perks. If you are just getting started, I suggest the
most basic plan for $3.95 per month. With this plan, you will receive 1
domain, 1 click installs, and unmetered bandwidth.Step #2: Choose a domain name.
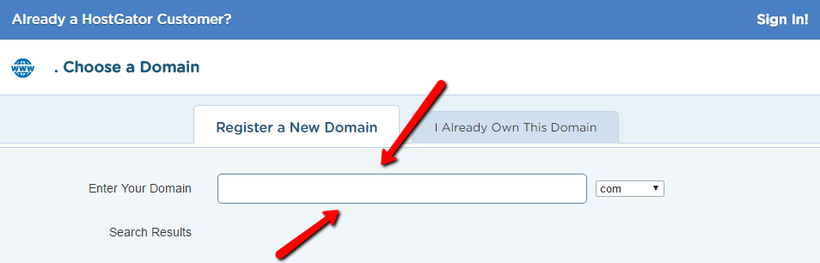 Whether
you already own the domain you want to use or you want to create a new
one, you will enter it right here. Just remember to make your domain
name something easy to both type and remember, and descriptive of your
site. If I am making a cupcake recipe website, I might choose something
like www.bakingwithme.com as opposed to something like
www.mycoolsite.com.
Whether
you already own the domain you want to use or you want to create a new
one, you will enter it right here. Just remember to make your domain
name something easy to both type and remember, and descriptive of your
site. If I am making a cupcake recipe website, I might choose something
like www.bakingwithme.com as opposed to something like
www.mycoolsite.com.Step #3: Confirm your hosting plan.
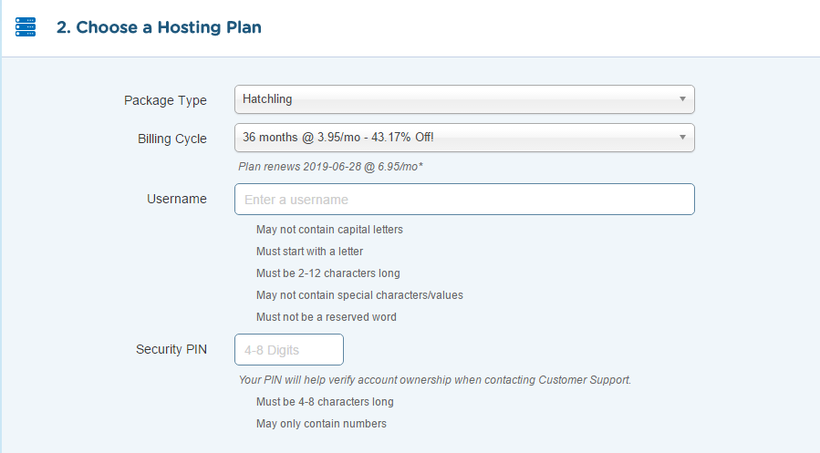 Once
you reach this step, you will have to confirm what hosting plan you
would like to take part in. If you want to pay $3.95 per month, you must
commit to 36 months. Otherwise, you may commit to just 1, 3, 6, 12, or
24 months for varying monthly prices.
Once
you reach this step, you will have to confirm what hosting plan you
would like to take part in. If you want to pay $3.95 per month, you must
commit to 36 months. Otherwise, you may commit to just 1, 3, 6, 12, or
24 months for varying monthly prices.Next, enter both your desired username and security pin. This will be used to log in to your account.
Step #4: Enter your billing information accordingly.
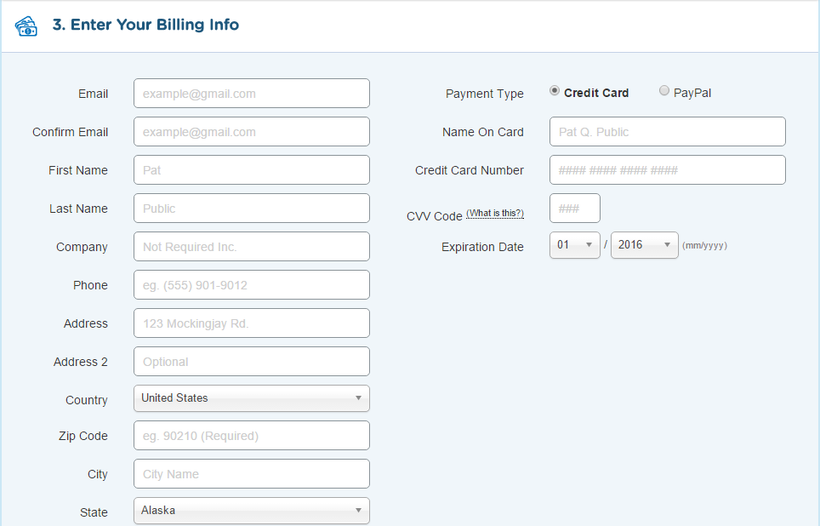 Hostgator
is going to ask for your basic billing information, so enter it into
the appropriate boxes. Double check to make sure that there are no
spelling or typing errors, then continue on. This one is pretty self
explanatory.
Hostgator
is going to ask for your basic billing information, so enter it into
the appropriate boxes. Double check to make sure that there are no
spelling or typing errors, then continue on. This one is pretty self
explanatory.Step #5: Add any additional services you think you may need.
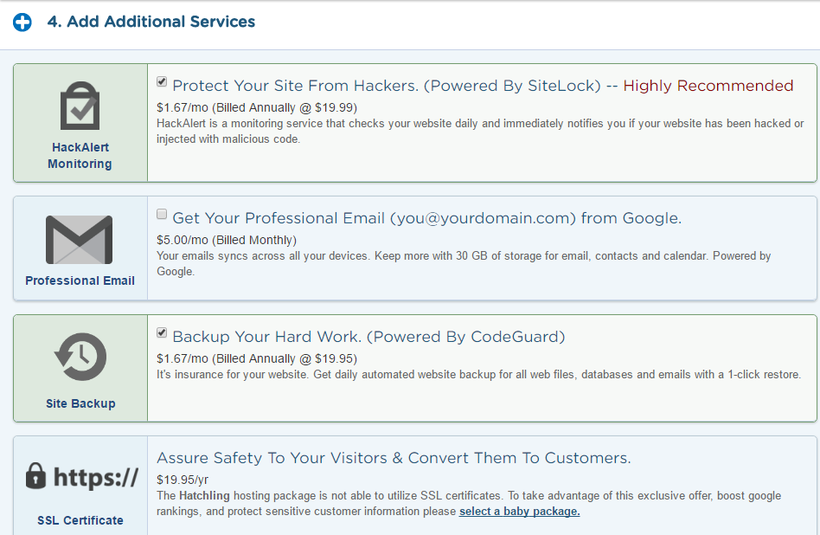 In
all actuality, I personally recommend that you don't use any of them.
That being said, if you fear you may get hacked or would like a site
backup guarantee, you can feel free to add any of the optional services
that you want.
In
all actuality, I personally recommend that you don't use any of them.
That being said, if you fear you may get hacked or would like a site
backup guarantee, you can feel free to add any of the optional services
that you want.Step #6: Enter a coupon code if you have one and proceed to check out.
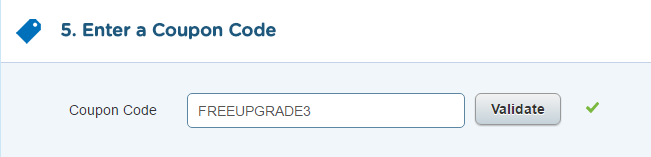 Many
bloggers are involved in affiliate programs with major hosting
companies like Hostgator. If you receive a code for a discounted monthly
plan, all you have to do is enter it into this box and click the
'Validate' button. The discount will be taken into account and removed
from your total cost when you review your order details at the bottom of
the page.
Many
bloggers are involved in affiliate programs with major hosting
companies like Hostgator. If you receive a code for a discounted monthly
plan, all you have to do is enter it into this box and click the
'Validate' button. The discount will be taken into account and removed
from your total cost when you review your order details at the bottom of
the page.Once you have reviewed your order details, you must click the 'I have read and agree...' button before checking out. After check out is complete, you have just completed half of the blog starting process!
Step #7: Check your email for login information.
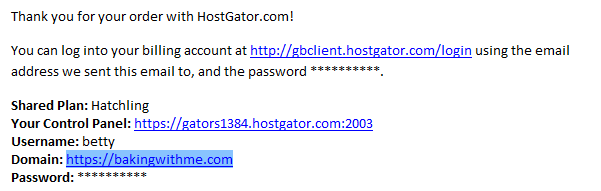 The
vast majority of websites hosted by web hosts like Hostgator come from
WordPress, so this next half of the tutorial is going to be about how we
can set p a WordPress account with our Hostgator information.
The
vast majority of websites hosted by web hosts like Hostgator come from
WordPress, so this next half of the tutorial is going to be about how we
can set p a WordPress account with our Hostgator information.In your emails, you should receive a confirmation with all of your login details, including your username, password, domain, and control panel link.
Step #8: Log in to Hostgator
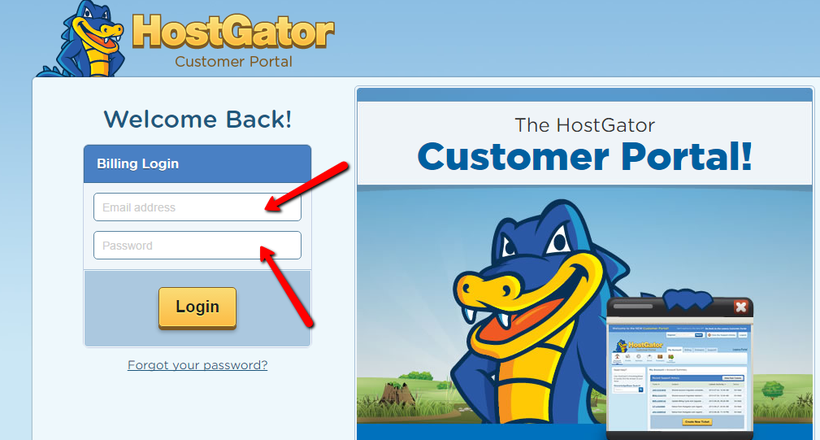 Head over to the Hostgator portal log in page and enter the username and information that has been confirmed in your email.
Step #9: QuickInstall WordPress.
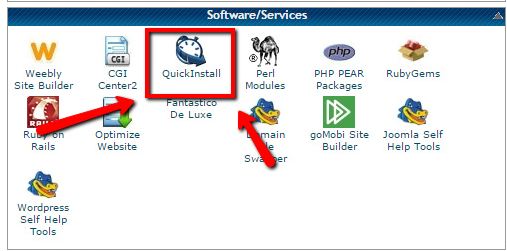 Click
on the QuickInstall button under the "Services/Software" section. From
there, click on the WordPress button under the Blog Software tab on the
left-hand side of the page. You will be met with a page asking you to
continue your installation. Click the Continue button, enter your blog
information, and then confirm by clicking Install Now.
Click
on the QuickInstall button under the "Services/Software" section. From
there, click on the WordPress button under the Blog Software tab on the
left-hand side of the page. You will be met with a page asking you to
continue your installation. Click the Continue button, enter your blog
information, and then confirm by clicking Install Now.The login information you will be asked to include are as follows: Your primary email address where your WordPress login information will be sent, your blog title, and your first and last name.
Guess what? You just set up your Hostgator blog! Congratulations!


Please use this space to share your thoughts or to leave a comment. Thank you again for showing interest in my work. I look forward to reading what you have to say.